In the last few months I have started to work with APIs, container platforms etc.
Its a great experience working with the technologies and it gives you a nice overview on how apps are deployed on these platforms, how you can do the maintance, what information you can get and so many many many other things!
While I was working with these technologies, I wanted to see how I can “setup” my own container platform environment and start playing around without messing up things in production at work!! 🙂
I managed to get this work in Azure, so I decided to document the whole process and show it to you.
This is part A which means that in part B I will try to make some interaction between the Azure DevOps environment and OpenShift platform trying to automate some basic OpenShift tasks.
So for now……….please enjoy part A !
Lets start:
Firstly, we need to create a Red Hat Account.
This will allow us to interact with OpenShift and most importantly to get a pull secret.
A pull secret is mandatory to create an ARO (Azure Red Hat OpenShift Cluster) in Azure.
We can use the following link to create an account:
https://console.redhat.com/

Secondly, a service principal is required for cluster creation, so we need to create one.
We need to do this because the service principal allows an azure application (in this case the OpenShift Cluster we are going to create) to interact with Azure Resources, so in other words an Azure service principal is an identity created for use with applications, hosted services, and automated tools to access Azure resources.
To create a SP select Azure Active Directory, then App registrations and then New registration.
After this is done, we can see its listed in the App Registrations page:

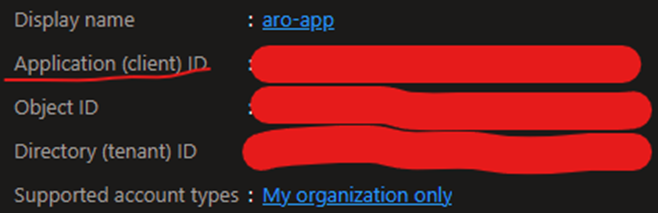
During the deployment of the Azure OpenShift Cluster, we will need to provide the Application ID and the secret value from this Application.
To get the application id, we simply click on the App we have just created.
Now, to get the secret value we need to create a secret first (obviously!).
To do this, we go to the left pane of the SP you have just created and select “certificates and secrets”, create a secret and copy paste the value of this secret (not the secret id).

Now that we have the Service Principal in place, we are ready to create an Azure ARO (Azure Red Hat OpenShift Cluster) in Azure. To do this, go to Azure portal and in the search bar start typing “Azure Red Hat” and after a few seconds you will get a recommendation:

Click on create and start filling in the basic information:

Regarding the Master and worker VMs you can always choose the size you want to have by clicking “change size”, but always keep in mind that worker node count must be minimum 3.
In the second tab “Authentication” we need to provide the following information:
- service principal client ID
- service principal secret
- Red Hat Pull secret.

We already have the Service principal ID and secret from previous steps so now we need to obtain the Red Hat pull secret.
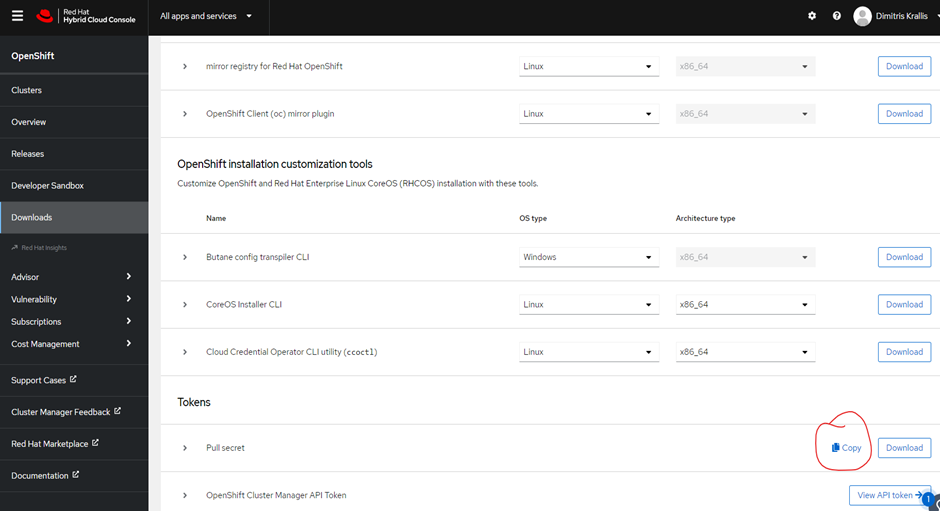
To grab this, we go to Red Hat portal https://console.redhat.com/
login with the account we recently created, and from the left pane go to “downloads” scroll down a bit and we will find the section Tokens where we can copy the pull secret:
So now that we have all the information needed to fill in the “Authentication” tab, we can go back to azure screen and continue.
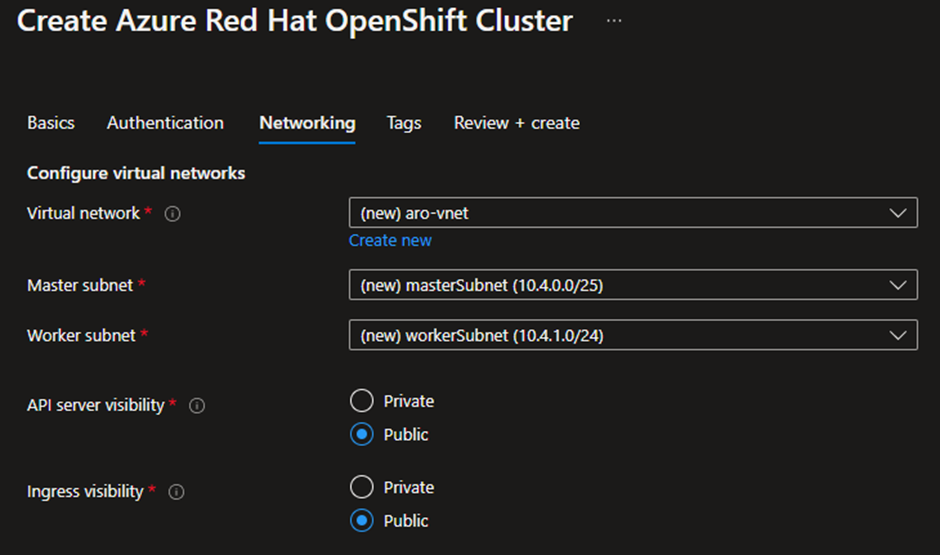
Next tab is about network. As we can see, Azure is going to create a VNET with two subnets.
One is dedicated to Master VMs and the other one for Workers VMs.
We can also choose if the API visibility is going to be Public or private, in this case we choose public.
After the deployment of the cluster is done, you get the link for the OpenShift console and some other information as well:

To login to the console, we will need the username and the password that has been automatically generated from Azure.
To do this, you need to go to the outputs of the deployment:

or you can get it using Azure cli like this:

with the first command you set the right Azure subscription (in case you have more than one) and the second one you just pass the name of the cluster and the RG as parameters.
After login, we have full access to the OpenShift console:

In part B I will show you how we can interact with OpenShift Cluster using Azure DevOps pipelines.
Please be aware of the costs.
The above implementation will cost you about…5-10 euros per day but its worth the time, the costs and the effort.
Thanks for reading this and see u in part B!
